Ok, so this is what i have been working on for the past few days....
....Now all i have to do is work on the mold and casting processes.
Thursday, 11 October 2012
Wednesday, 10 October 2012
A really complicated wall!
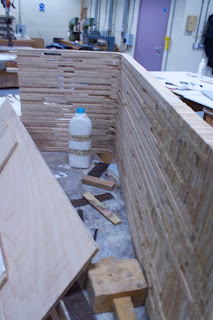
Wow, building a stone wall with brick quoins the rain is hard. I am enjoying it though. Tomorrow I will re-lay the three bricks on the top right and then start another side.
Meanwhile in the shed I am starting my Halloween costume. Expect a post about that within the next few days.
Meanwhile in the shed I am starting my Halloween costume. Expect a post about that within the next few days.
Sunday, 7 October 2012
Twisted Arch
I think a few of you might like this one.
First of all i had to build two twisted piers, the bit of plywood above is used to plumb down to to maintain the twist. (I had to cut the square out of the middle.)
Me posing in front of a job well done.
I have not got much money, so i printed out all the plans on my home printer. The above image is of the 1:1 scale plans of the brick boxes being stuck down ready for cutting.
then they get screwed together with my faithful Makita screwdriver.
The bricks then go in the brick boxes and are marked ready for cutting.
Yeah, it was messy!
I put two screws in the board so the bricks didn't slip.
I only cut about a third of the bricks needed here.
A random picture of my plans.
the arch former I designed is assembled and the brick boxes showing where the bricks will go.
Ready for the build.
When building any arch you need to build it up evenly from each side.
Nearly there.
Finished.
It's amazing what you can build with a Cauliflower; Happy days!
First of all i had to build two twisted piers, the bit of plywood above is used to plumb down to to maintain the twist. (I had to cut the square out of the middle.)
Me posing in front of a job well done.
I have not got much money, so i printed out all the plans on my home printer. The above image is of the 1:1 scale plans of the brick boxes being stuck down ready for cutting.
then they get screwed together with my faithful Makita screwdriver.
The bricks then go in the brick boxes and are marked ready for cutting.
Yeah, it was messy!
I put two screws in the board so the bricks didn't slip.
I only cut about a third of the bricks needed here.
A random picture of my plans.
the arch former I designed is assembled and the brick boxes showing where the bricks will go.
Ready for the build.
When building any arch you need to build it up evenly from each side.
Nearly there.
Finished.
Coffee Table; Part Three
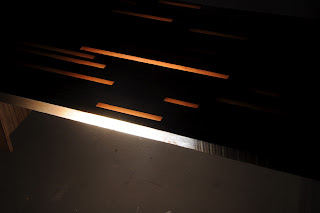
Here Is some photo's of the table. Hopefully like me you get the impression that it relates to the light cast by the fan from the first post of this project.
I will just re-post it.
I will just re-post it.
Coffee Table; Part Two
The Making Of My Coffee Table.
Here I am gluing strips of plywood together to create the table top.
The strips were made three at a time using a template to mark the cut.
like this.
Here they are being clamped glued and tied together on a former to ensure a square leg.
the layers were pinned down using scrap timber and folding wedges.
some of the looser sections were tied together with spacers in to avoid warping.
This is what it ended up looking like.
in this photo you can see that i started to fill in the other end of the table with hundreds of tiny bits of plywood.
Until I managed to use bigger bits.
The Other leg was made with the plywood running the same way as the previous image
Then It was sanded.
This was a test assembly, with a lot of sanding in between.
Then I used Varnish and six coats of beeswax to build up the finish.
Next, Coffee Table; Part Three, the photo shoot
Here I am gluing strips of plywood together to create the table top.
The strips were made three at a time using a template to mark the cut.
like this.
Here they are being clamped glued and tied together on a former to ensure a square leg.
the layers were pinned down using scrap timber and folding wedges.
some of the looser sections were tied together with spacers in to avoid warping.
This is what it ended up looking like.
in this photo you can see that i started to fill in the other end of the table with hundreds of tiny bits of plywood.
Until I managed to use bigger bits.
The Other leg was made with the plywood running the same way as the previous image
Then It was sanded.
This was a test assembly, with a lot of sanding in between.
Then I used Varnish and six coats of beeswax to build up the finish.
Coffee Table; Part One
For a part of my Degree Work I decided to make a table.
This Is the finished Result, Below is some of the sketches that i used to get to this!
I initialy started to look at the similarity's between the Chinese and Spanish. I found that I liked the way the light fell on the hand fans. I knew I wanted to encorporate this into furniture somehow.
Eventualy I came up with the Sketches below.
This was me playing with the form and chucking a few new ideas in the mix. For example the table on the bottom right would have included an EL-Tape stripe.
This is close to the final design, I drew this from a card model I made. If you like Sketch Models look for the post called 'Shadow Puppet'.
There it is, now all i did was refine it on the computer (Form-Z) and print the plans.
The next post will be the making of the table.
This Is the finished Result, Below is some of the sketches that i used to get to this!
I initialy started to look at the similarity's between the Chinese and Spanish. I found that I liked the way the light fell on the hand fans. I knew I wanted to encorporate this into furniture somehow.
Eventualy I came up with the Sketches below.
This was me playing with the form and chucking a few new ideas in the mix. For example the table on the bottom right would have included an EL-Tape stripe.
This is close to the final design, I drew this from a card model I made. If you like Sketch Models look for the post called 'Shadow Puppet'.
The next post will be the making of the table.
The Little Boat That Could
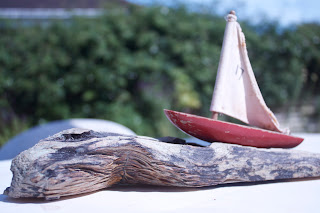
One of the Clients where I work commissioned me to mount a little boat she found on a local beach. So I sourced a suitable piece of driftwood from my store of random but interesting objects, Then cut and sculpted it so that it resembled a wave. I love this little thing, I didn't want to give it to her. You can see why below!
Who needs Instagram, when you have a decent camera!
I just like this shot
I love the way the wood looks like a wake.
I positioned the boat at an angle to imply that it's sailing in choppy conditions
No Design would be complete with out a plan view.
I like the way the boat is missing some paint and the wood is weathered. It's almost like the two were meant to be displayed together.
A card I designed Just in case she wanted anything else doing.
These felt pads were made from the felt pad nails you can buy from a tool shop that go on the bottom of chairs to protect the floor.
I made the underneath of the wave with a Dremel and a using a cutoff wheel.
Oh, It looks like the little boat sank in this picture; it was perfect on my computer. Oh well it looks good!
Subscribe to:
Posts (Atom)


